


Enter your VAT number here and click Verify:
Your details have been verified. VAT number registered to:
,
.
Your order will now be zero rated for VAT purposes. We reserve the right to verify these details after your order request has been made and reinstate VAT if required.
Your VAT details were not recognised or were invalid. Your VAT number must be matched to your Billing Country as specified above. This is currently specified as . You do not need to enter the country code part of your VAT number as this has already been selected in your billing address details above.
The VAT number checking service is currently offline. Please supply your VAT details within the comments or special instructions field below and we will apply a VAT discount after placing your order request.
- Accessories
- Brakes
- Chassis / Bodywork
- Clothing & Gifts
- Electrical & Relays
- Engine Cooling
- Engine Electrical
- Engine Rebuild Parts
- Engine Tuning
- Exhausts
- Exterior Styling / Spoilers
- Gearbox / Transmission
- Heating / Air Conditioning
- Hydraulics
- Incar / Multimedia
- Interior & Accessories
- Lighting
- Mats & Carpets
- Motorsport and Off-Road
- Parts for Other Cars
- Pedal Cluster
- Rubber Seals
- Seats & Seat Belts
- Service Parts
- Special Offer Parts
- Steering Parts
- Suspension & Axle
- Suspension Upgrades
- Tyres
- Wheel Accessories
- Wheels
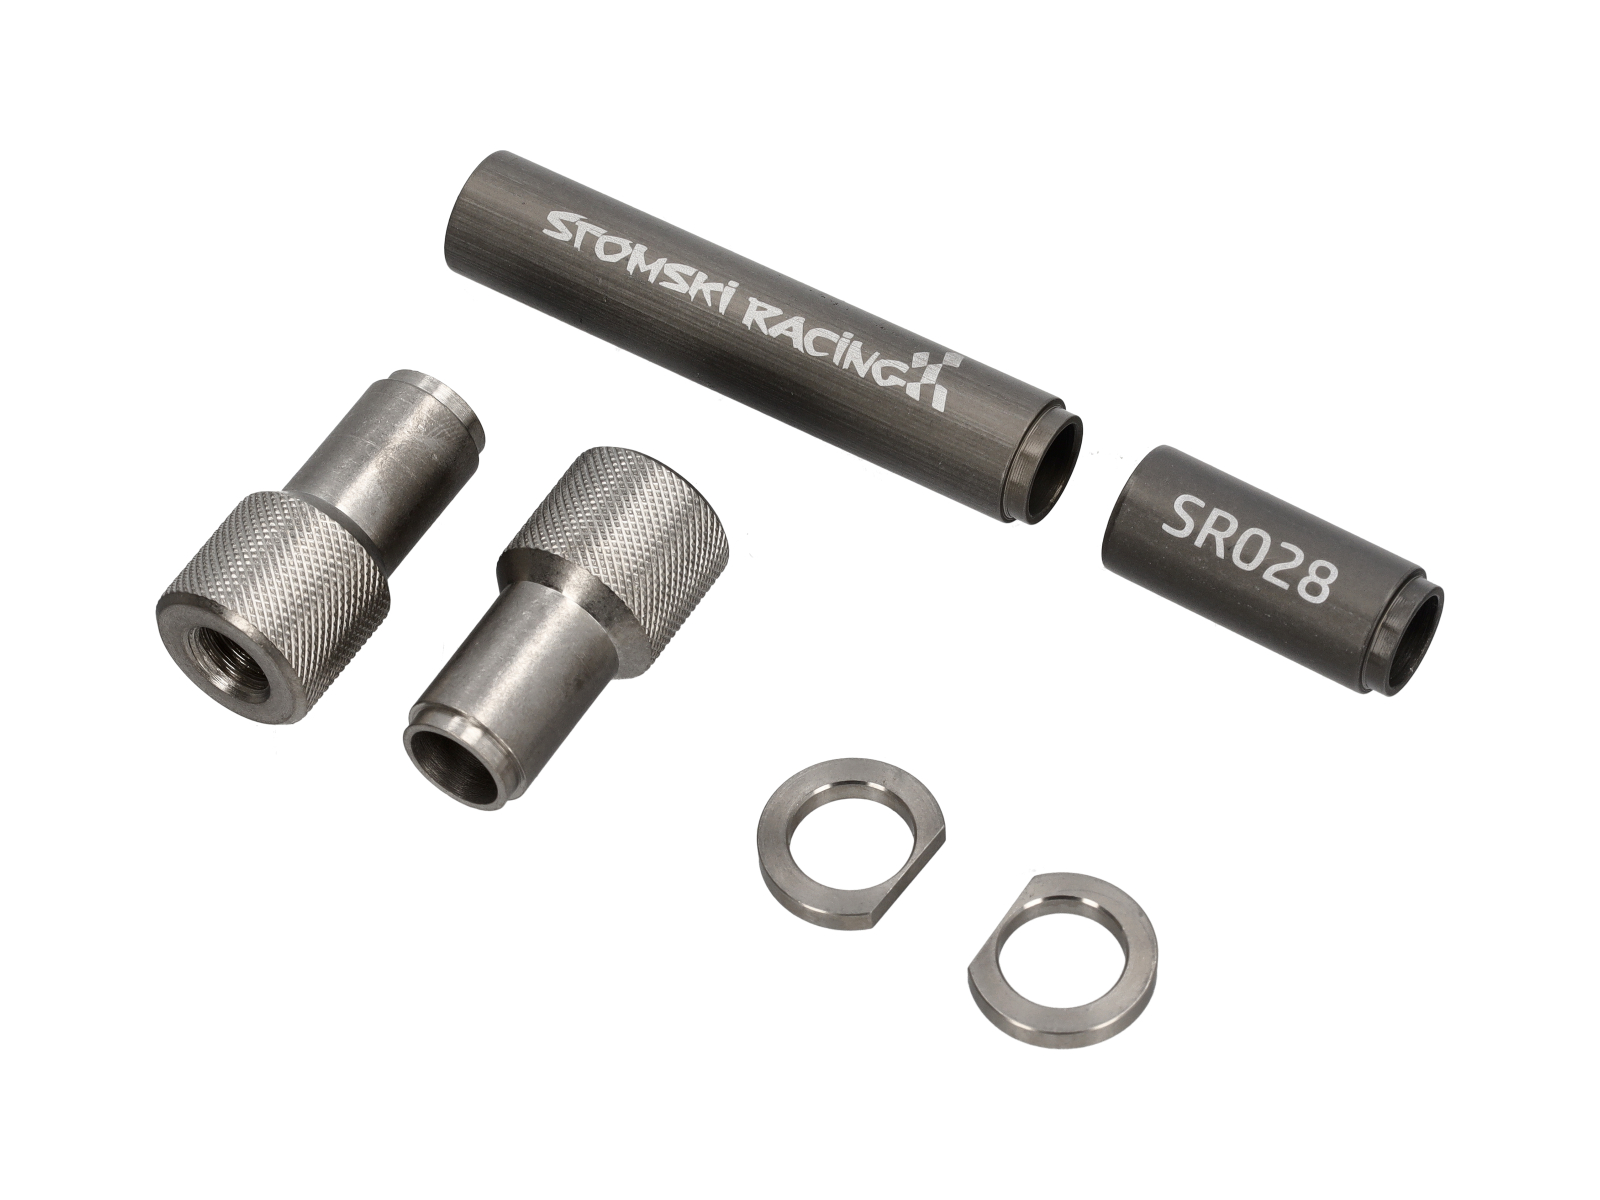
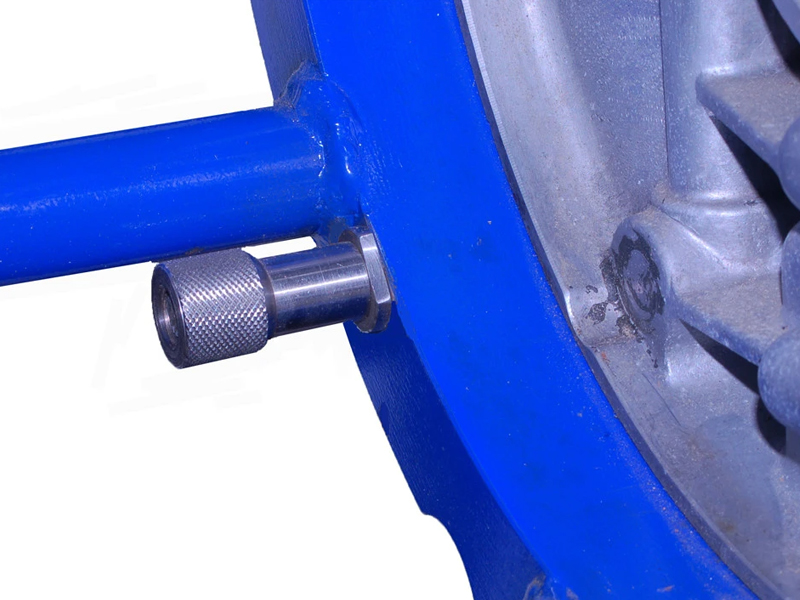
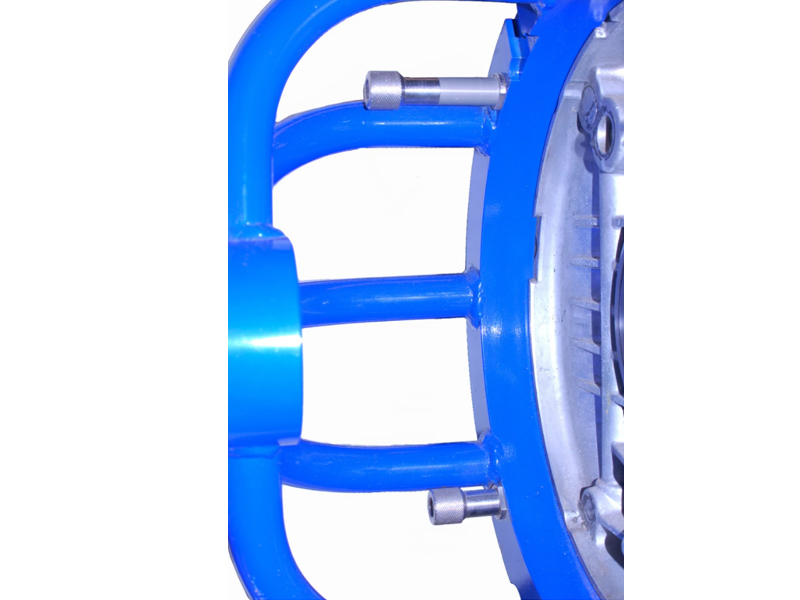
Specialist Tools

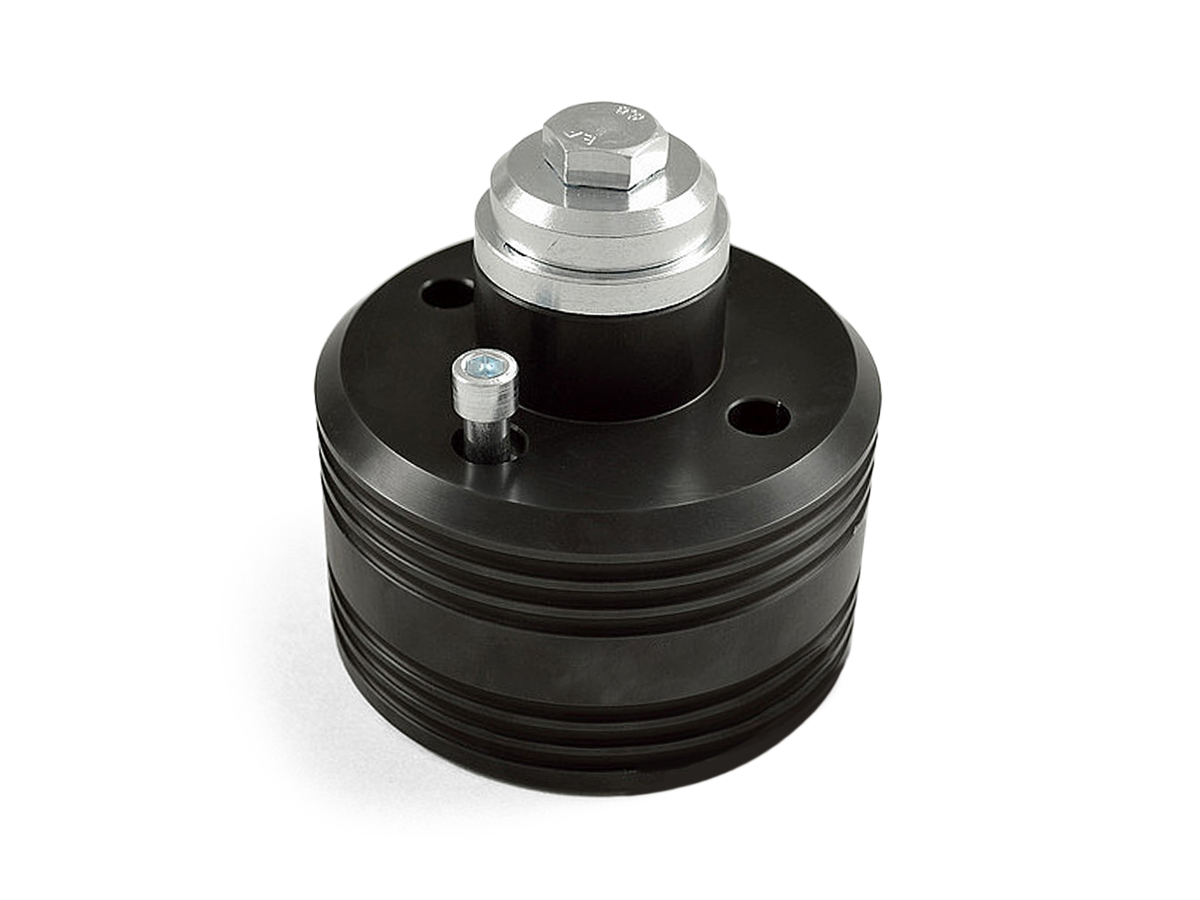
Finally an elegant way to secure your engine to the engine yoke. No need for sockets, washers, and oversized nuts to take up slack. Use these knurled nuts and adapters to mount the different length case studs to the yoke. These adapters allow clearance for mounting the clutch. Hard-coated aluminum and stainless steel for years of service.
 Shop Securely
 12 Month Warranty
 Worldwide Delivery

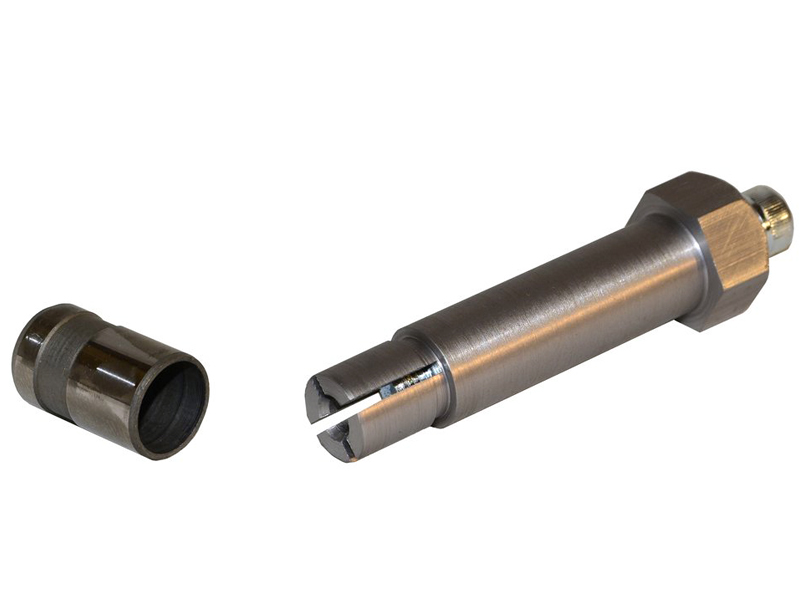
Tolerance between the pressure relief plug and its galley are very close, and the slightest bit of gunk, corrosion, or bur will cause the plug to freeze up in the oil passage. A magnet is rarely powerful enough to overcome the seized plug, and leaving it in place is never an option.
Using STOMSKI RACING's Oil Pressure Relief Plug Extractor makes the task of removing the stuck plug a breeze, and allows you to ensure clean oil passages, and a properly operating bypass system.
The collet-based tool slides easily into the open end of the seized plug and a simple turn or two of the internal socket head cap screw expands the tool, grasping the plug to ensure easy removal.
Anodized Aluminum.
- Porsche 911 1965-1968 2.0L / 912 SWB (F)
- Porsche 911 1968-1973 2.2L / 2.4L / 2.7L RS LWB (F)
- Porsche 911 1974-1977 2.7L / 1976-77 3.0 Carrera
- Porsche 911 1978-1983 3.0L / SC
- Porsche 911 1984-1986 3.2L
- Porsche 911 1987-1989 3.2L G50
- Porsche 911 1975-1977 3.0L Turbo (930)
- Porsche 911 1978-1989 3.3L Turbo (930)
- Porsche 964 (911) C2 1989-93
- Porsche 964 (911) C4 1989-93
- Porsche 964 (911) RS 3.6L 1991-93
- Porsche 964 (911) RS 3.8L 1991-93
- Porsche 964 (911) TURBO 3.3L 1991-93
- Porsche 964 (911) TURBO 3.6L 1991-93
- Porsche 993 (911) C2 1994-97
- Porsche 993 (911) C4 1994-97
- Porsche 993 (911) RS 1994-97
- Porsche 993 (911) C2S 1994-97
- Porsche 993 (911) C4S 1994-97
- Porsche 993 (911) TURBO 1994-96
- Porsche 993 (911) GT2 1994-97
- Porsche 993 (911) TURBO S 1994-97
- Porsche 996 C2 3.4L 1997-08/01
- Porsche 996 C4 3.4L 1997-08/01
- Porsche 996 C2 3.6L 09/01-2005
- Porsche 996 C4 3.6L 09/01-2005
- Porsche 996 C4S 3.6L 09/01-2005
- Porsche 996 TURBO 2000-05
- Porsche 996 GT2 2001-05
- Porsche 996 GT3 MKI 1999-02
- Porsche 996 GT3 MKII 2003>>
- Porsche 996 GT3 RS 2003-04
- Porsche 997 MK1 Carrera 2 3.6L 2005-08
- Porsche 997 MK1 Carrera 2S 3.8L 2005-08
- Porsche 997 MK1 Carrera 4 3.6L 2005-08
- Porsche 997 MK1 Carrera 4S 3.8L 2005-08
- Porsche 997 MK1 TURBO 2007-09
- Porsche 997 MK1 GT3 2007-09
- Porsche 997 MK1 GT2 2007-09
- Porsche 997 MKII Carrera C2 3.6L 2009-12
- Porsche 997 MKII Carrera C4 3.6L 2009-12
- Porsche 997 MKII Carrera C2S 3.8L 2009-12
- Porsche 997 MKII Carrera C4S 3.8L 2009-12
- Porsche 997 MKII GT3 2010-11
- Porsche 997 MKII Turbo 2010-13
- Porsche 997 MKII GT2 RS 2011-13
- Porsche 914 (1970-1976)
Shop Securely
12 Month Warranty
Worldwide Delivery

Fits
Boxster/Cayman 1997-2008
Porsche 911 Carrera 1999-2008 (Excludes Turbo, GT3 and GT2 models)
Description of Tool
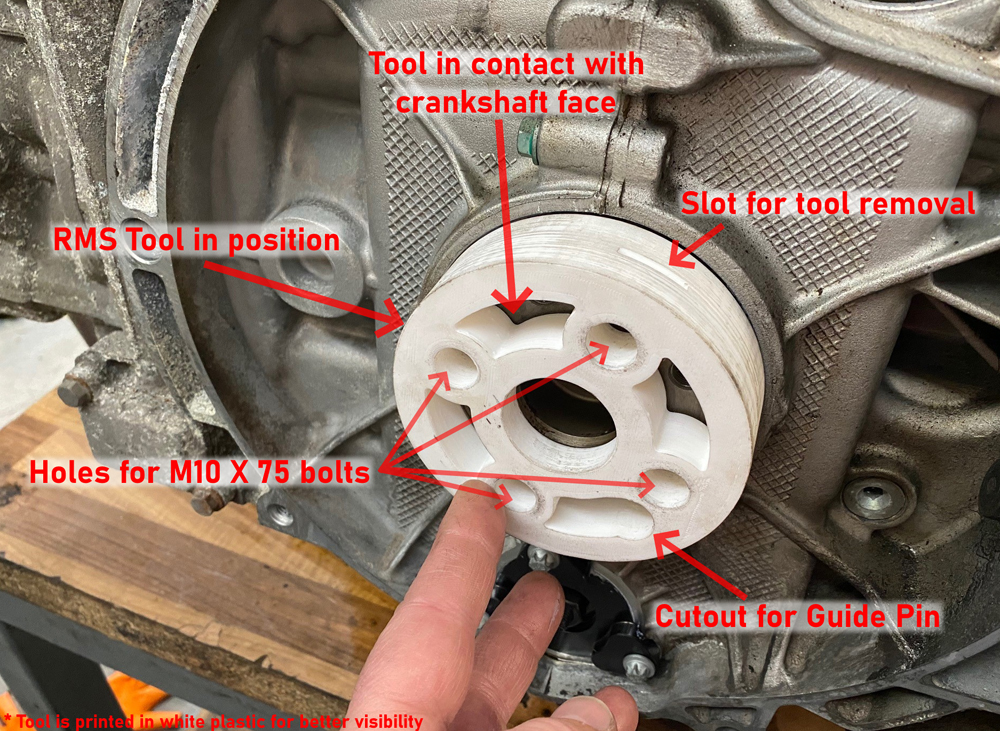
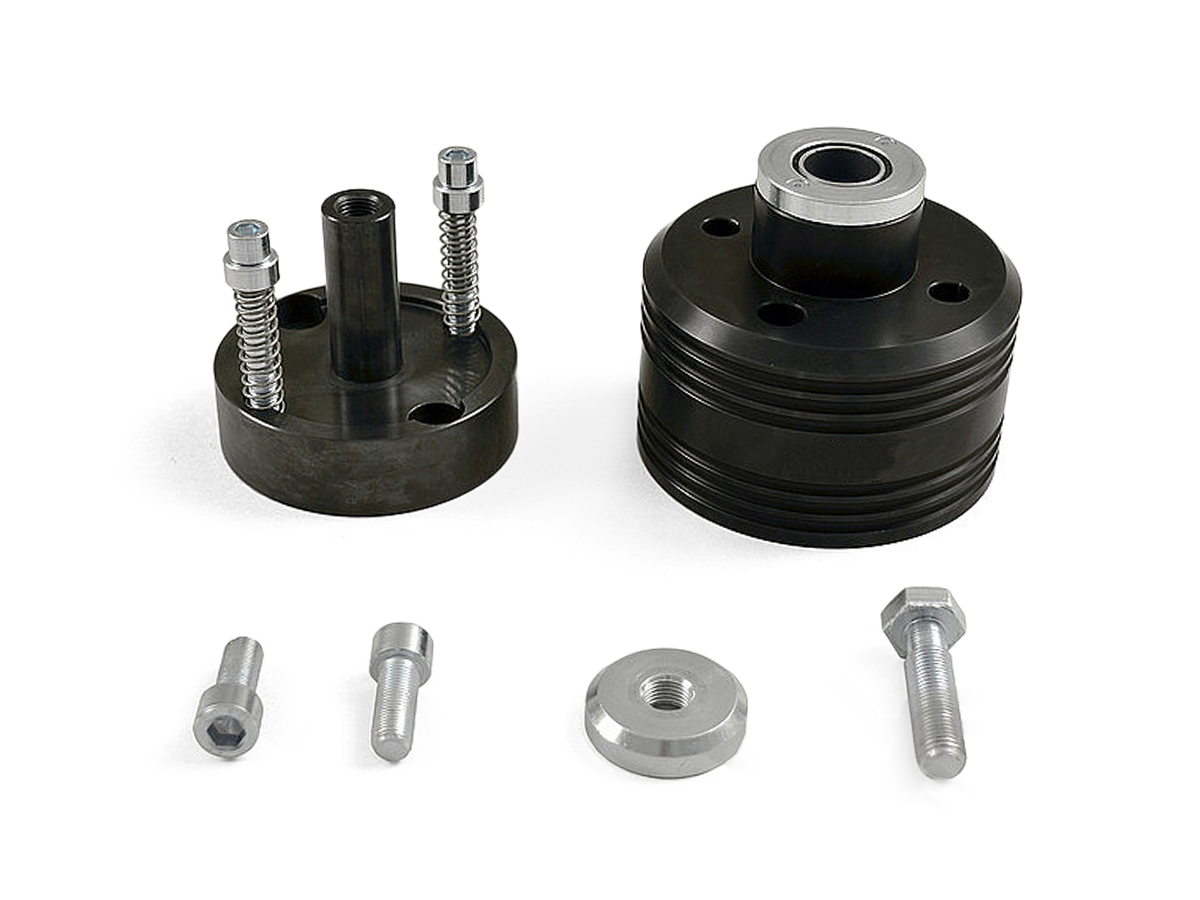
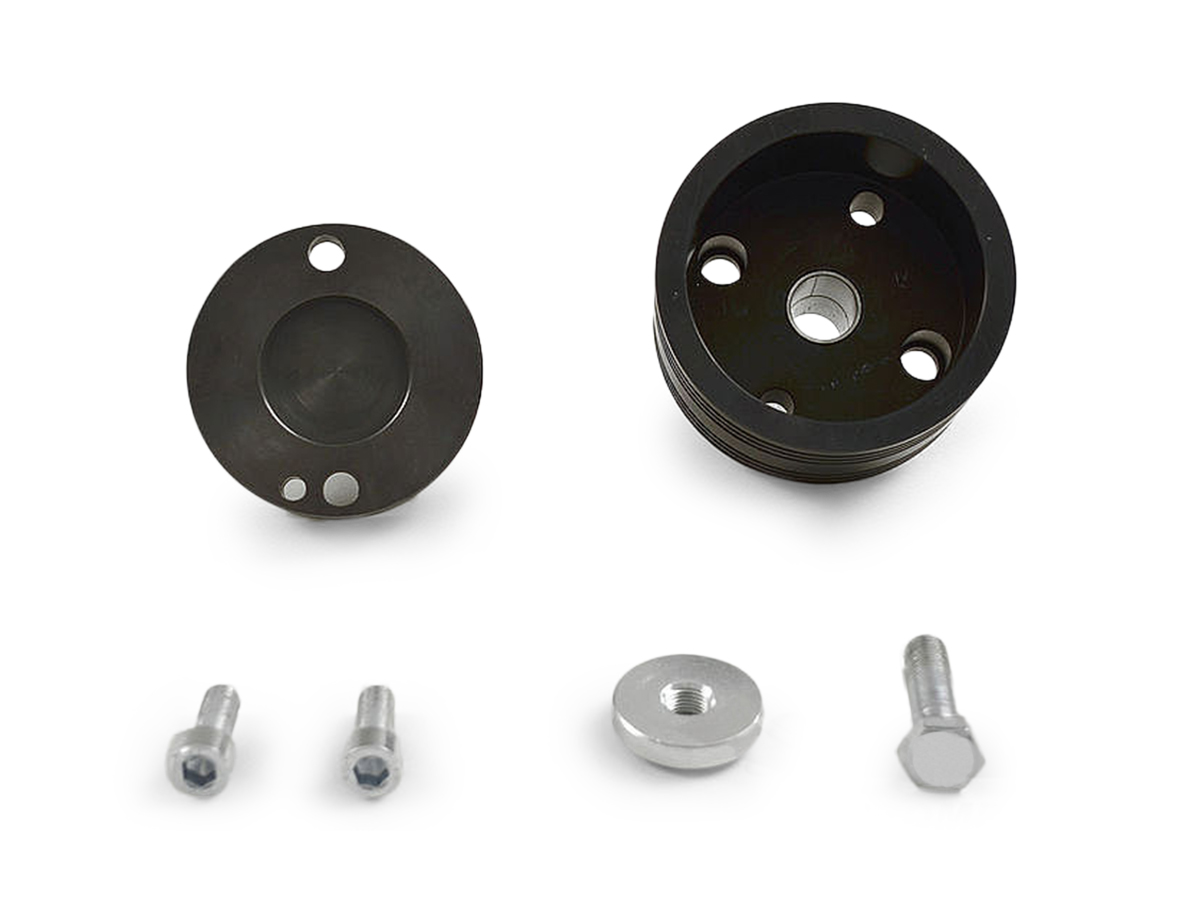
This is a 3D Printed tool for installing the Rear Main Seal on Porsche M96/M97 engines to the correct depth without damage to the seal. The tool is 3D printed from hard, black plastic and is very solid and durable. It is aimed at DIYers and hobbyists due to its low cost in comparison to the official Porsche tool, but would be well suited to small independent garages as the tool can be reused many times without damage.
How to use
Care must be taken when using this tool as although it is designed to make the installation of the seal as easy as possible, it is still possible to damage or incorrectly install the seal if care is not taken to install the seal properly. We accept no responsibility for incorrect usage of the tool and possible damage to the seal or engine of the vehicle. We advise you to always confirm with a digital calipers or other measuring device to make sure the seal is installed at the correct depth.
To use this tool you will also need 4 M10 X 75mm bolts and 4 washers. This is to allow for the extra thickness of the tool, and to spread the force from the bolts across the surface of the tool.
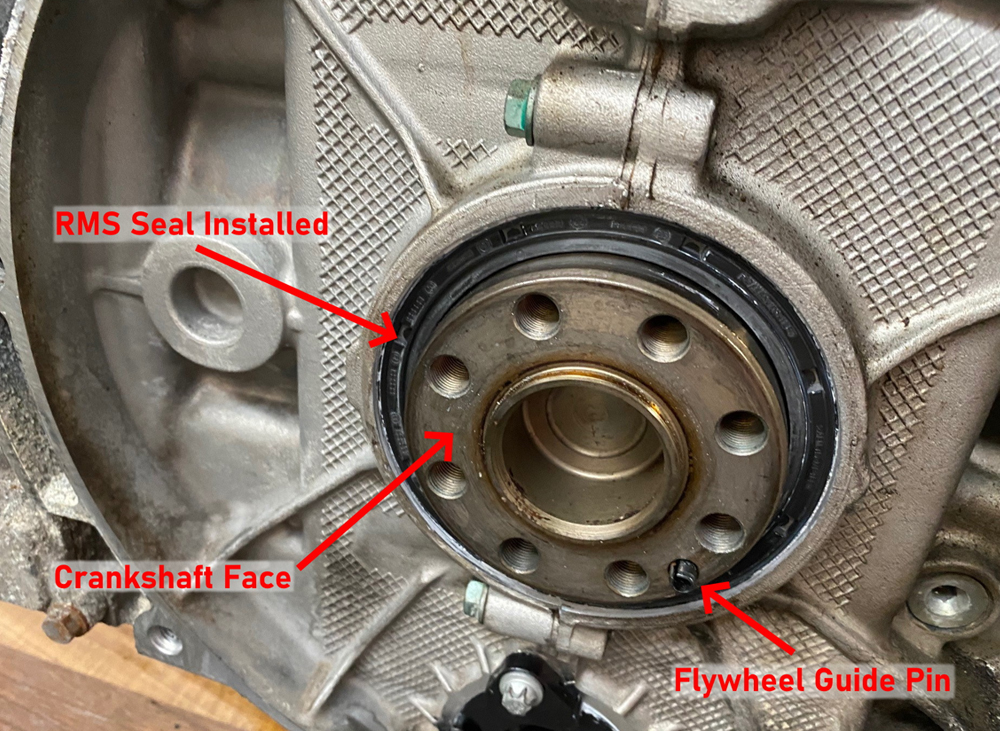
The seal must first be correctly orientated and then gently located into the opening around the crankshaft. To do this, leave the blue plastic ring in place and place the seal over the end of the crankshaft. Then push the seal on gently so that the end of the crankshaft pushes the blue ring out of the seal and the seal gets pushed onto the outside of the crankshaft.
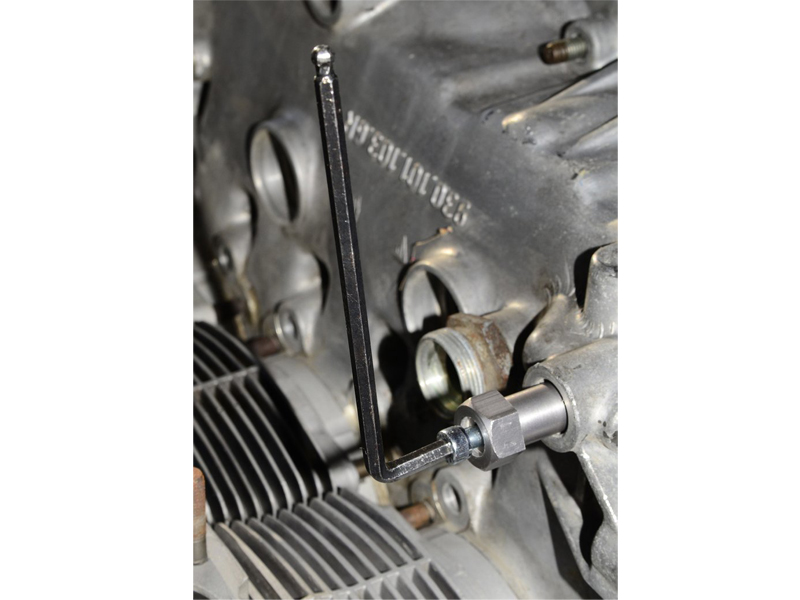
Next place the RMS fitting tool over the seal and thread each of the 4 bolts into the crankshaft, through the holes in the tool. Make sure to orientate the tool so that the cut-out for the flywheel guide pin in the crankshaft lines up with the pin. Screw each bolt in slowly until they just about make contact with the face of the tool. From this point on the seal will start to be inserted into the engine.
Turn each bolt a quarter turn at a time, turning all 4 a quarter turn before tightening the first one again, and continuing the cycle. It is very important that the bolts are tightened small amounts, one at a time to make sure that the seal is inserted straight and not at an angle which will damage the seal.
Repeat this until the face of the crankshaft comes into contact with the inner face of the tool and it will not push the seal in any further. Remember that the tool is plastic so excessive force at the point will possibly damage the tool and push the seal in too far.
The 4 bolts can now be unscrewed and fully removed from the crankshaft. The tool can then be removed. It may be a slightly tight fit, and if it is difficult to remove by hand then there are slots in the sides of the tool to allow a screwdriver or prying tool to grip the tool and remove it. If using the slots, be careful to apply even force to both sides to ensure that the tool does not come out at an angle and get stuck or potentially move the seal.
Once the tool and bolts are removed, visually inspect the seal to make sure there is no damage. Then, use a ruler, digital callipers or depth gauge, check the depth of the seal. It should measure 13mm, from the face of the crankshaft to the face of the seal. As long as the tool was used correctly and is suitable for your engine, the seal will be installed at the right depth.
These instructions are only intended as a rough guide, you should always check a workshop manual or research online to ensure the part is being installed correctly. Using this tool requires some practical knowledge so if you are not confident in your abilities please do not attempt to install the seal yourself.
Related reference numbers
Related, superseded, cross reference or alternative numbers for comparison.
0PB105249
The product you are viewing cross references to these numbers
- Porsche Boxster 986 2.5L 1997-99
- Porsche Boxster 986 2.7L 1999-02
- Porsche Boxster S 986 3.2L 1999-02
- Porsche Boxster 986 2.7L 2003-04
- Porsche Boxster S 986 3.2L 2003-04
- Porsche Boxster 987 2.7L 2005-08/08
- Porsche Boxster 987 S 3.2/3.4L 2005-08/08
- Porsche 996 C2 3.4L 1997-08/01
- Porsche 996 C4 3.4L 1997-08/01
- Porsche 996 C2 3.6L 09/01-2005
- Porsche 996 C4 3.6L 09/01-2005
- Porsche 996 C4S 3.6L 09/01-2005
- Porsche 997 MK1 Carrera 2 3.6L 2005-08
- Porsche 997 MK1 Carrera 2S 3.8L 2005-08
- Porsche 997 MK1 Carrera 4 3.6L 2005-08
- Porsche 997 MK1 Carrera 4S 3.8L 2005-08
- Porsche Cayman 2.7L 987C 2006-08
- Porsche Cayman S 3.4L 987C 2005-08
Shop Securely
12 Month Warranty
Worldwide Delivery

Fits
Porsche 986 Boxster 2.5lrr / 2.7ltr
Porsche 986 Boxster S 3.2ltr
Porsche 987.1 Boxster / Cayman 2.7ltr
Porsche 987.1 Boxster / Cayman 2.9ltr
Porsche 987.1 Boxster S / Cayman S
Porsche 987.1 RS Spyder
Porsche 996 Carrera 2 / Carrera 4
Porsche 996 Carrera 4S
Porsche 997.1 Carrera 2 / Carrera 4
Porsche 997.1 Carrera 2S /Carrera 4S
This special service tool was developed for the correct installation of the rear main oil seal.
Trying to do this task with any other method is risking engine damage by the way of a damaged rear main seal
German made
- Porsche Boxster 986 2.5L 1997-99
- Porsche Boxster 986 2.7L 1999-02
- Porsche Boxster S 986 3.2L 1999-02
- Porsche Boxster 986 2.7L 2003-04
- Porsche Boxster S 986 3.2L 2003-04
- Porsche Boxster 987 2.7L 2005-08/08
- Porsche Boxster 987 S 3.2/3.4L 2005-08/08
- Porsche 996 C2 3.4L 1997-08/01
- Porsche 996 C4 3.4L 1997-08/01
- Porsche 996 C2 3.6L 09/01-2005
- Porsche 996 C4 3.6L 09/01-2005
- Porsche 996 C4S 3.6L 09/01-2005
- Porsche 997 MK1 Carrera 2 3.6L 2005-08
- Porsche 997 MK1 Carrera 2S 3.8L 2005-08
- Porsche 997 MK1 Carrera 4 3.6L 2005-08
- Porsche 997 MK1 Carrera 4S 3.8L 2005-08
- Porsche 997 MK1 TURBO 2007-09
- Porsche 997 MK1 GT3 2007-09
- Porsche 997 MK1 GT2 2007-09
Shop Securely
12 Month Warranty
Worldwide Delivery

Fits:
Porsche 911
Porsche 996
Porsche 924S
Porsche 944
Porsche 968
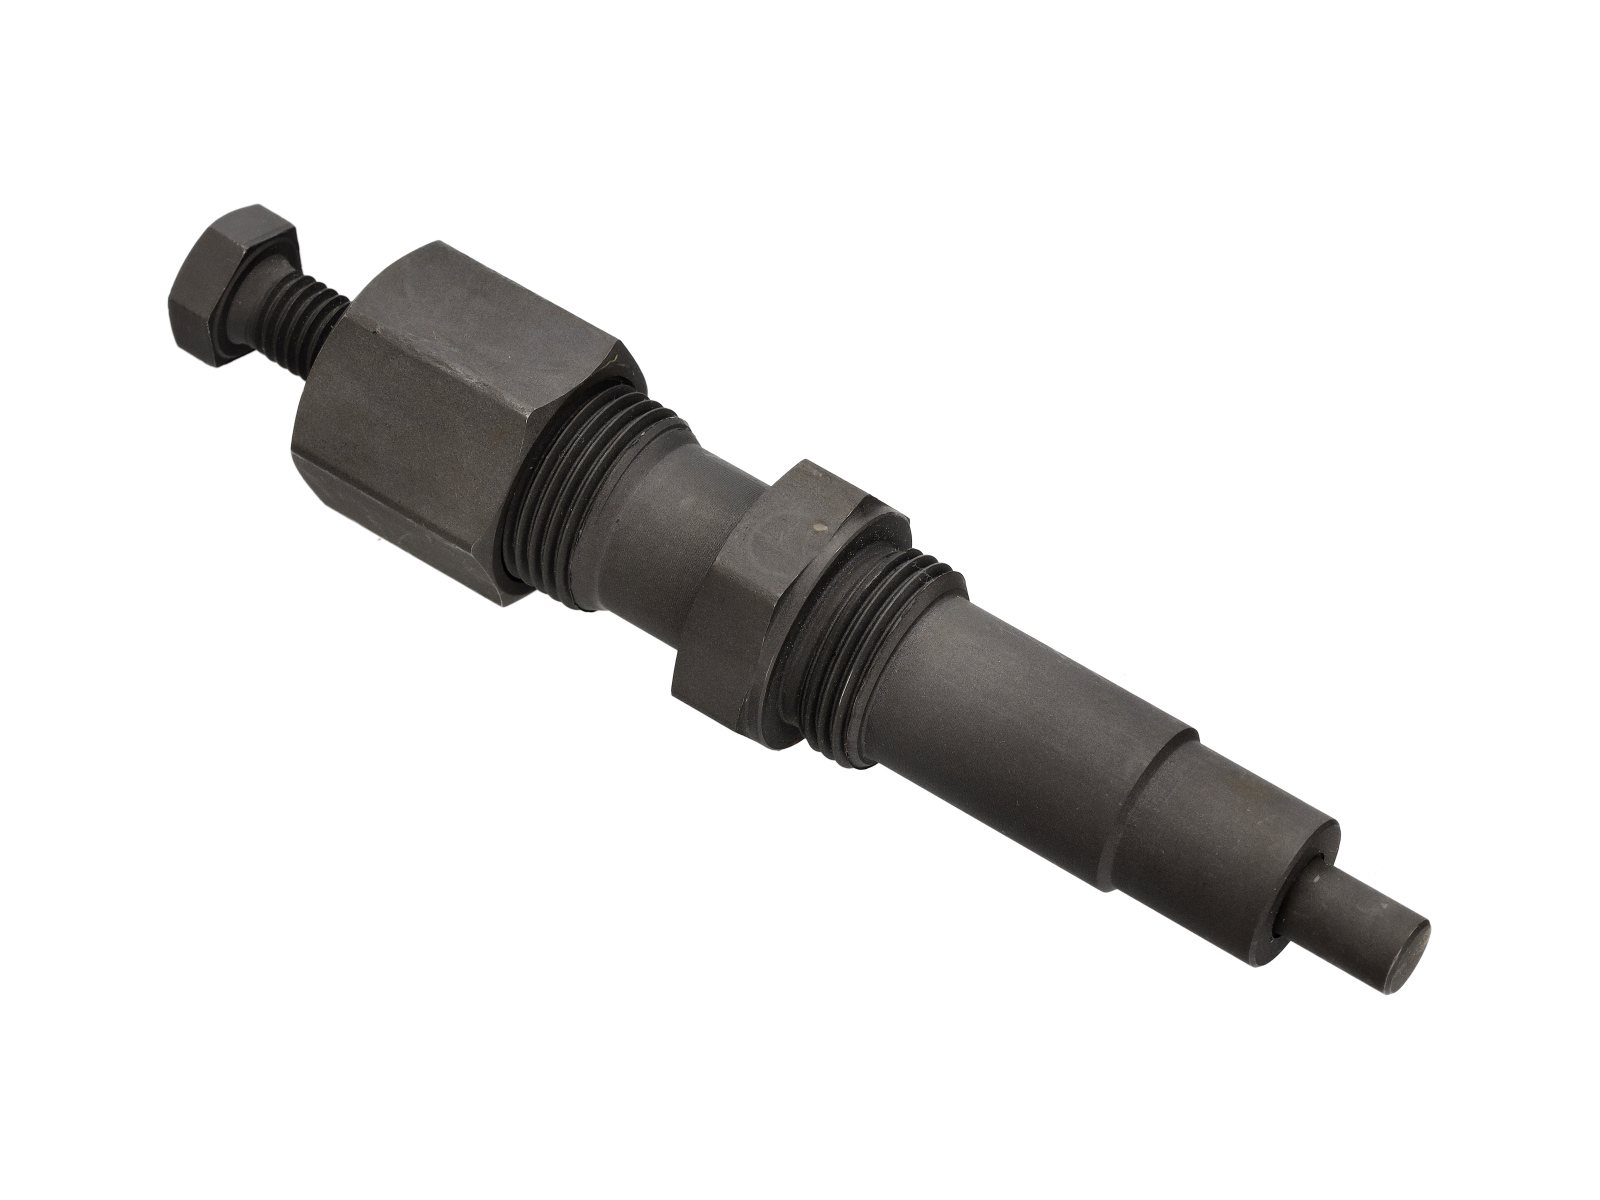
Description:
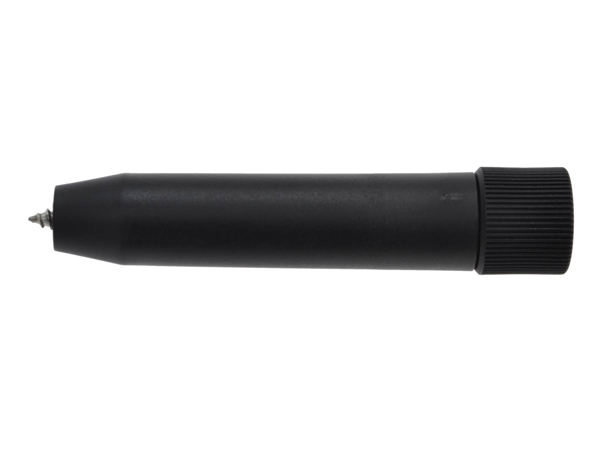
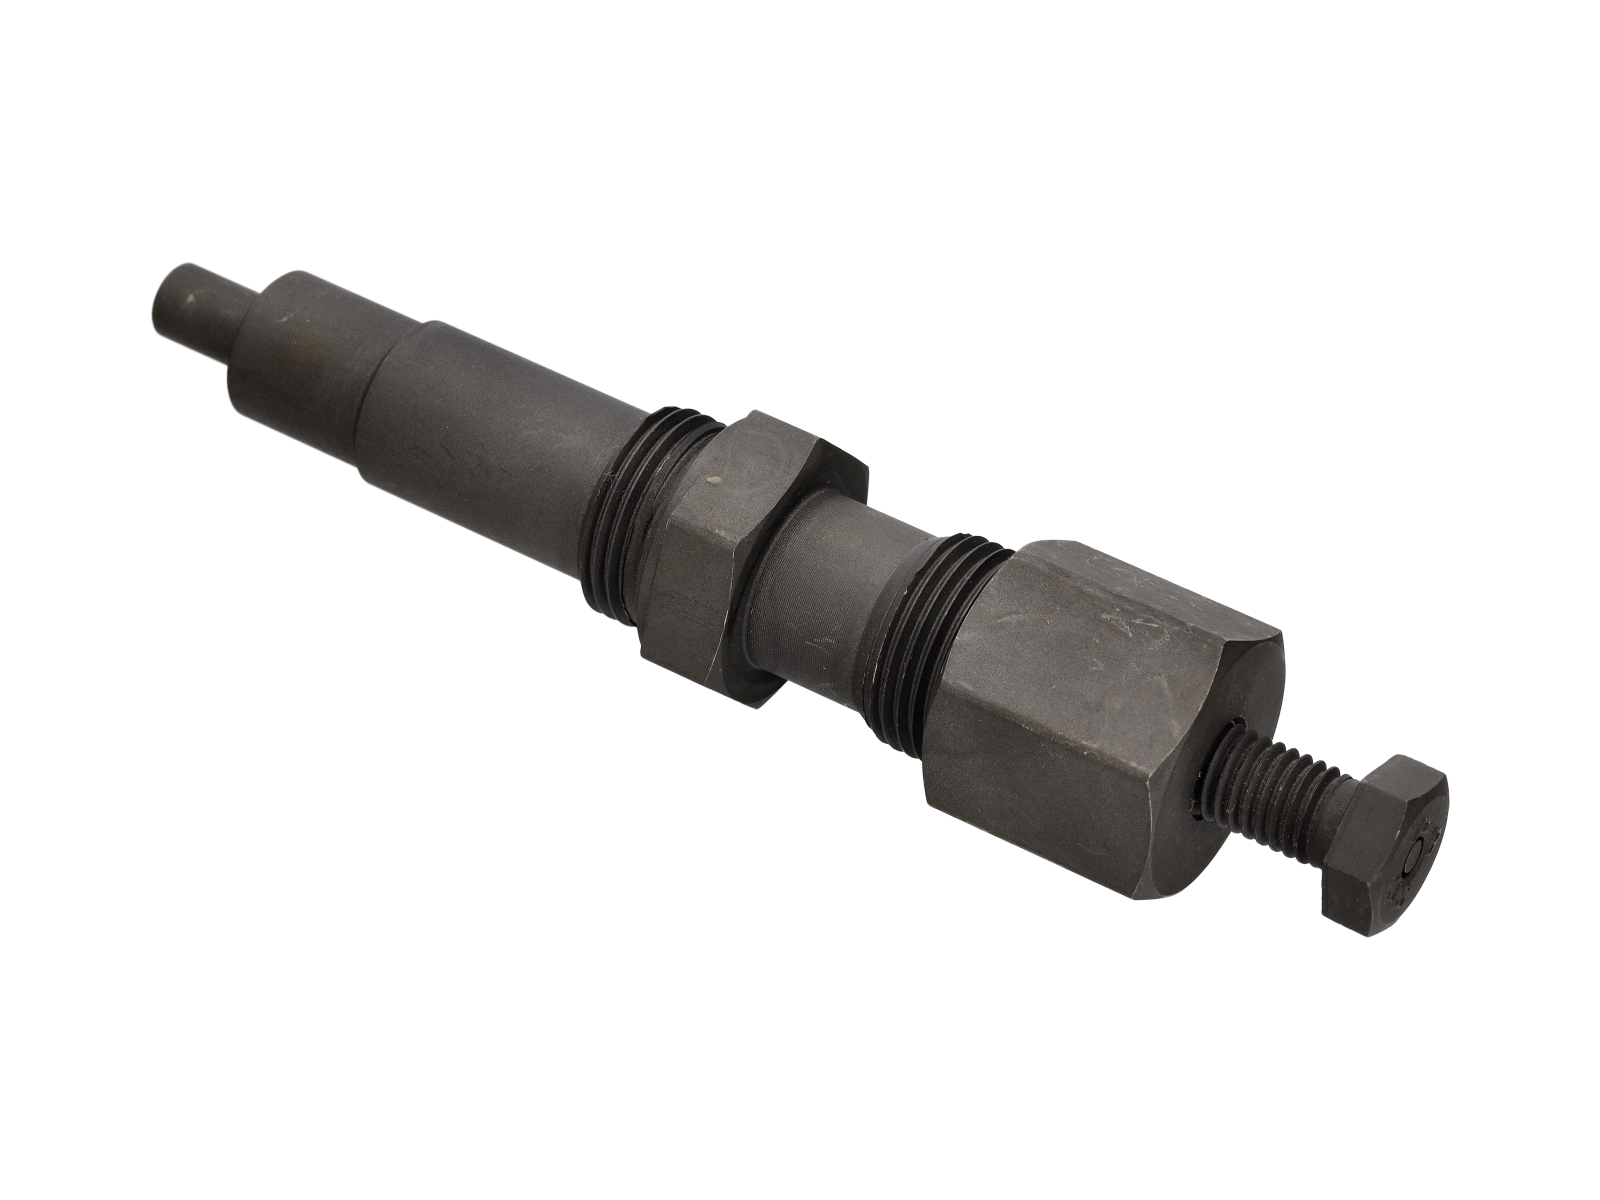
With this special tool, the filters of the injectors can be removed quickly, cleanly and effectively. In addition, the tool has a centering syringe on the head side, with which the new filter can be pressed straight into the injection nozzle without tilting.
Related reference numbers
Related, superseded, cross reference or alternative numbers for comparison.
5167
The product you are viewing cross references to these numbers
- Porsche 911 1965-1968 2.0L / 912 SWB (F)
- Porsche 911 1968-1973 2.2L / 2.4L / 2.7L RS LWB (F)
- Porsche 911 1974-1977 2.7L / 1976-77 3.0 Carrera
- Porsche 911 1978-1983 3.0L / SC
- Porsche 911 1984-1986 3.2L
- Porsche 911 1987-1989 3.2L G50
- Porsche 911 1975-1977 3.0L Turbo (930)
- Porsche 911 1978-1989 3.3L Turbo (930)
- Porsche 996 C2 3.4L 1997-08/01
- Porsche 996 C4 3.4L 1997-08/01
- Porsche 996 C2 3.6L 09/01-2005
- Porsche 996 C4 3.6L 09/01-2005
- Porsche 996 C4S 3.6L 09/01-2005
- Porsche 996 TURBO 2000-05
- Porsche 996 GT2 2001-05
- Porsche 996 GT3 MKI 1999-02
- Porsche 996 GT3 MKII 2003>>
- Porsche 996 GT3 RS 2003-04
- Porsche 924S 2.5L 1986-87
- Porsche 924S 2.5L 1988
- Porsche 944 2.5L 8V 1982-87
- Porsche 944 2.7L 8V 1988-89
- Porsche 944S 2.5L 16V 1987-88
- Porsche 944S2 3.0L 16V 1989-91
- Porsche 944 Turbo 2.5L 8V 1985-88
- Porsche 944 Turbo 2.5L 8V 1989-91
- Porsche 944 Turbo S 2.5L 8V 1988
- Porsche 968 3.0L 1992-94
- Porsche 968 Sport 3.0L 1994-95
- Porsche 968 CS 3.0L 1993-95
- Porsche 968 Turbo S 3.0L 1993-94
Shop Securely
12 Month Warranty
Worldwide Delivery

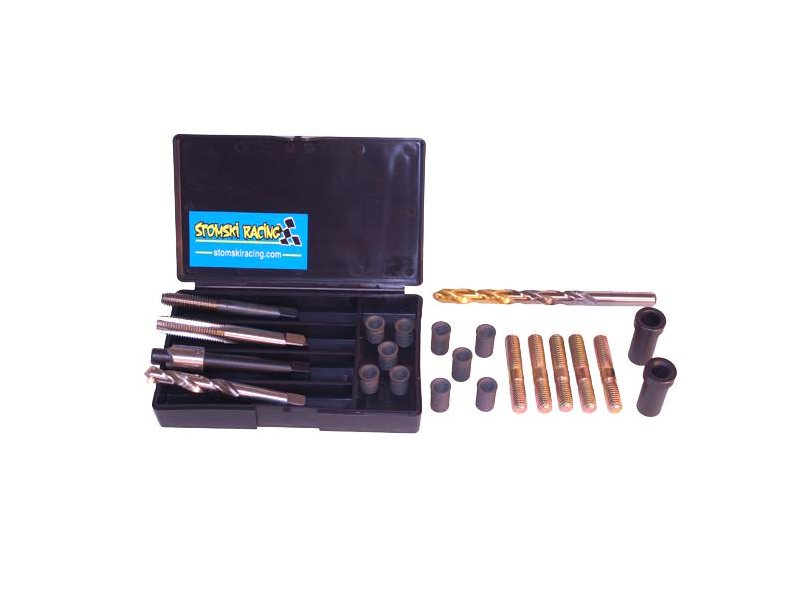
For exhaust port studs on 911, Boxster, 996/997 or GT3 heads where the threads have been pulled, or to recover from an already improper repair, we have developed this Time-Sert(tm) kit so you may use our SR065, SR067, SR068 or SR069 tools to insert a Time-Sert and save an otherwise ruined head. In addition to the standard Time-Sert(tm) parts (short P drill, counter-bore, tap, insert tool, and 5 short inserts), our kit also includes a full length P drill, two drill jigs/bushings to guide the P drill and tap in our SR065, SR067, or SR068 fixtures, 5 full length inserts, and 5 studs.
Time-Sert(tm) is a registered trademark of TIME FASTENER COMPANY
- Porsche 911 1965-1968 2.0L / 912 SWB (F)
- Porsche 911 1968-1973 2.2L / 2.4L / 2.7L RS LWB (F)
- Porsche 911 1974-1977 2.7L / 1976-77 3.0 Carrera
- Porsche 911 1978-1983 3.0L / SC
- Porsche 911 1984-1986 3.2L
- Porsche 911 1987-1989 3.2L G50
- Porsche 911 1975-1977 3.0L Turbo (930)
- Porsche 911 1978-1989 3.3L Turbo (930)
- Porsche 964 (911) C2 1989-93
- Porsche 964 (911) C4 1989-93
- Porsche 964 (911) RS 3.6L 1991-93
- Porsche 964 (911) RS 3.8L 1991-93
- Porsche 964 (911) TURBO 3.3L 1991-93
- Porsche 964 (911) TURBO 3.6L 1991-93
- Porsche 993 (911) C2 1994-97
- Porsche 993 (911) C4 1994-97
- Porsche 993 (911) RS 1994-97
- Porsche 993 (911) C2S 1994-97
- Porsche 993 (911) C4S 1994-97
- Porsche 993 (911) TURBO 1994-96
- Porsche 993 (911) GT2 1994-97
- Porsche 993 (911) TURBO S 1994-97
- Porsche 996 C2 3.4L 1997-08/01
- Porsche 996 C4 3.4L 1997-08/01
- Porsche 996 C2 3.6L 09/01-2005
- Porsche 996 C4 3.6L 09/01-2005
- Porsche 996 C4S 3.6L 09/01-2005
- Porsche 996 TURBO 2000-05
- Porsche 996 GT2 2001-05
- Porsche 996 GT3 MKI 1999-02
- Porsche 996 GT3 MKII 2003>>
- Porsche 996 GT3 RS 2003-04
- Porsche 997 MK1 Carrera 2 3.6L 2005-08
- Porsche 997 MK1 Carrera 2S 3.8L 2005-08
- Porsche 997 MK1 Carrera 4 3.6L 2005-08
- Porsche 997 MK1 Carrera 4S 3.8L 2005-08
- Porsche 997 MK1 TURBO 2007-09
- Porsche 997 MK1 GT3 2007-09
- Porsche 997 MK1 GT2 2007-09
- Porsche 997 MKII Carrera C2 3.6L 2009-12
- Porsche 997 MKII Carrera C4 3.6L 2009-12
- Porsche 997 MKII Carrera C2S 3.8L 2009-12
- Porsche 997 MKII Carrera C4S 3.8L 2009-12
- Porsche 997 MKII GT3 2010-11
- Porsche 997 MKII Turbo 2010-13
- Porsche 997 MKII GT2 RS 2011-13
Shop Securely
12 Month Warranty
Worldwide Delivery

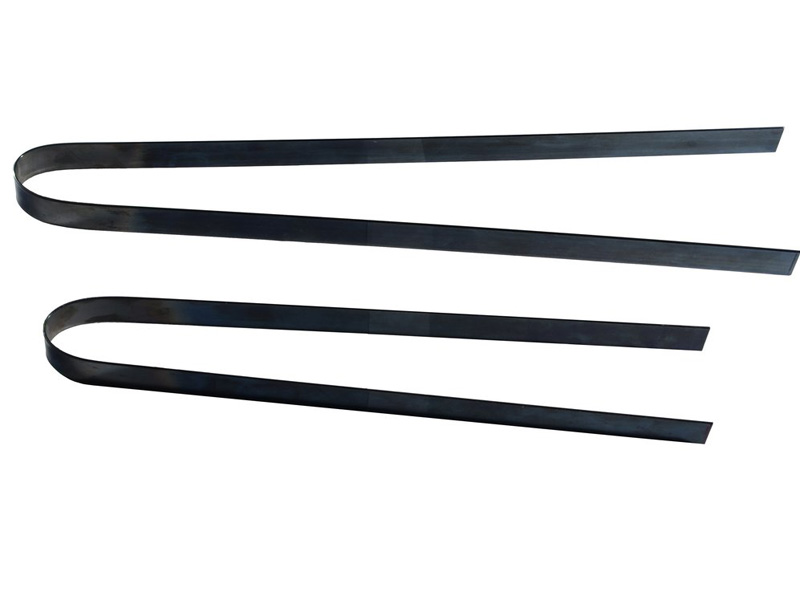
When assembling the case halves on the 911 engine STOMSKI RACING's SR222-GT3 Timing Chain Strap will prove instrumental in supporting the chain to allow easier mating of the halves. Proper length, radius bend, tension, and quality steel insure that this tool will provide reliable and consistent support for all your engine builds.
fits
• SR222-GT3 for the 996/997 GT2, GT3, and TT engines.
- Porsche 996 C2 3.4L 1997-08/01
- Porsche 996 C4 3.4L 1997-08/01
- Porsche 996 C2 3.6L 09/01-2005
- Porsche 996 C4 3.6L 09/01-2005
- Porsche 996 C4S 3.6L 09/01-2005
- Porsche 996 TURBO 2000-05
- Porsche 996 GT2 2001-05
- Porsche 996 GT3 MKI 1999-02
- Porsche 996 GT3 MKII 2003>>
- Porsche 996 GT3 RS 2003-04
- Porsche 997 MK1 Carrera 2 3.6L 2005-08
- Porsche 997 MK1 Carrera 2S 3.8L 2005-08
- Porsche 997 MK1 Carrera 4 3.6L 2005-08
- Porsche 997 MK1 Carrera 4S 3.8L 2005-08
- Porsche 997 MK1 TURBO 2007-09
- Porsche 997 MK1 GT3 2007-09
- Porsche 997 MK1 GT2 2007-09
- Porsche 997 MKII Carrera C2 3.6L 2009-12
- Porsche 997 MKII Carrera C4 3.6L 2009-12
- Porsche 997 MKII Carrera C2S 3.8L 2009-12
- Porsche 997 MKII Carrera C4S 3.8L 2009-12
- Porsche 997 MKII GT3 2010-11
- Porsche 997 MKII Turbo 2010-13
- Porsche 997 MKII GT2 RS 2011-13
Shop Securely
12 Month Warranty
Worldwide Delivery

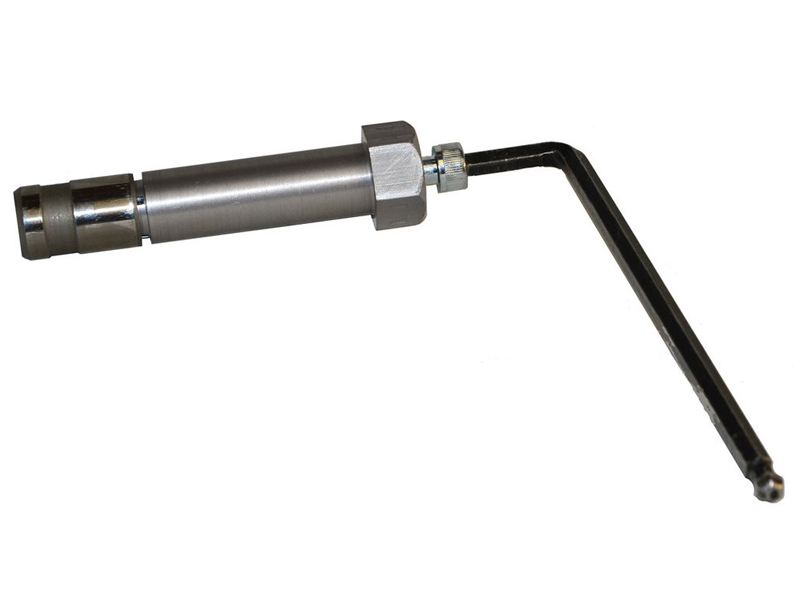
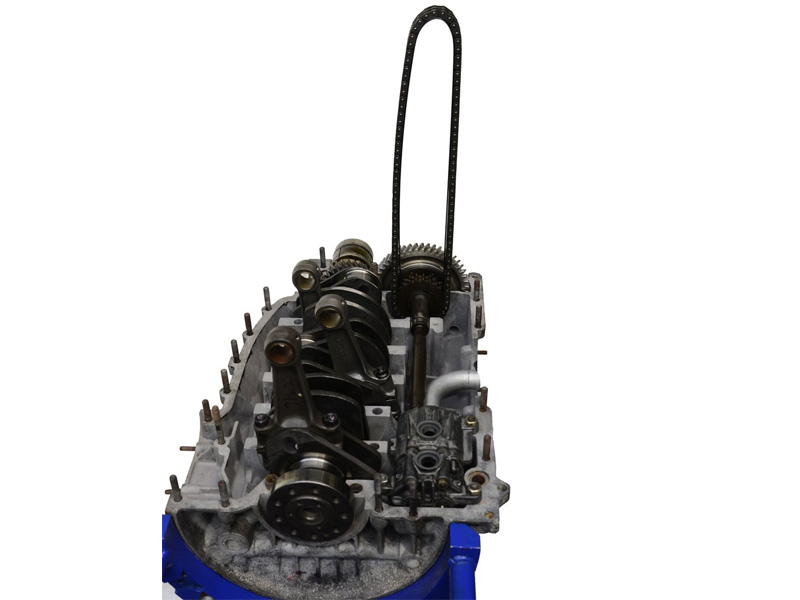
Timing Chain Tensioner for Porsche – Essential Tool for Accurate Camshaft Timing Alignment
This timing chain tensioner tool is designed
specifically for Porsche models equipped with the M96 engine, including
the 986 Boxster, 987 Boxster, 996 Carrera and 997.1
Carrera. When performing timing chain replacement, camshaft timing
adjustments or major internal engine work, this tool is essential for applying
the correct tension to the timing chain to ensure precise camshaft alignment.
Fits:
- Porsche Boxster 986 2.5L 1997-99
- Porsche Boxster 986 2.7L 1999-02
- Porsche Boxster S 986 3.2L 1999-02
- Porsche Boxster 986 2.7L 2003-04
- Porsche Boxster S 986 3.2L 2003-04
- Porsche Boxster 987 2.7L 2005 -08/08
- Porsche Boxster 987 S 3.2/3.4L 2005-08/08
- Porsche 996 C2 3.4L 1997-08/01
- Porsche 996 C4 3.4L 1997-08/01
- Porsche 996 C2 3.6L 09/01-2005
- Porsche 996 C4 3.6L 09/01-2005
- Porsche 996 C4S 3.6L 09/01-2005
- Porsche 996 TURBO 2000-05
- Porsche 996 GT2 2001-05
- Porsche 996 GT3 MKI 1999-02
- Porsche 996 GT3 MKII 2003>>
- Porsche 996 GT3 RS 2003-04
- Porsche 997 MK1 Carrera 2 3.6L 2005-08
- Porsche 997 MK1 Carrera 4 3.6L 2005-08
Because the M96 engine uses a multi-chain system with variable chain tension, maintaining the correct load on the chain is critical. Without controlled tension, the camshafts can drift out of position, resulting in misfires, camshaft correlation faults, loss of power or severe internal engine damage. This tensioner tool ensures safe and repeatable timing alignment during every rebuild or service.
What This Timing Chain Tensioner Tool Does
This specialised tool allows technicians to:
- Apply
accurate tension to the timing chain during timing setup
- Prevent
camshaft rotation while timing adjustments are made
- Support correct alignment of camshafts and crankshaft
- Replicate
operational chain loading for accurate timing calibration
- Assist with IMS-related timing work
- Improve precision during rebuilds, head gasket repairs and chain tensioner replacement
It is essential for working on the complex timing system of the M96 engine - Ideal for any workshop servicing early and mid-generation water-cooled flat-six engines.
Why Timing Chain Systems Fail on Porsche M96 Engines
The M96 engine is known for specific timing chain
vulnerabilities, including:
- Chain
stretch due to age and heat cycles
- Worn
chain guides, especially the plastic guide rails
- Hydraulic
tensioner fatigue, causing intermittent timing rattle
- IMS
bearing wear, which can influence chain tension
- Oil
contamination, impacting tensioner pressure
- Incorrect tension set during previous repairs
- Thermal expansion, causing chain slack or misalignment
Symptoms commonly include timing rattle on cold start, poor idle quality, VVT faults, misfires and check-engine lights.
Why You Should Replace or Use a Precision Timing Chain Tensioner Tool
A timing chain tensioner tool designed for the M96 engine
ensures:
- Accurate chain tension for safe timing setup
- Correct camshaft and crankshaft synchronisation
- Protection against piston-to-valve contact
- Cleaner, faster and more precise timing chain installation
- Fewer diagnostic errors during camshaft timing verification
- Reduced risk of long-term engine damage
- Professional-grade results, even in home workshop settings
This is a must-have tool for any timing chain or IMS-related service on the M96 engine.
Related reference numbers
Related, superseded, cross reference or alternative numbers for comparison.
C4007
The product you are viewing cross references to these numbers
- Porsche Boxster 986 2.5L 1997-99
- Porsche Boxster 986 2.7L 1999-02
- Porsche Boxster S 986 3.2L 1999-02
- Porsche Boxster 986 2.7L 2003-04
- Porsche Boxster S 986 3.2L 2003-04
- Porsche Boxster 987 2.7L 2005-08/08
- Porsche Boxster 987 S 3.2/3.4L 2005-08/08
- Porsche 996 C2 3.4L 1997-08/01
- Porsche 996 C4 3.4L 1997-08/01
- Porsche 996 C2 3.6L 09/01-2005
- Porsche 996 C4 3.6L 09/01-2005
- Porsche 996 C4S 3.6L 09/01-2005
- Porsche 996 TURBO 2000-05
- Porsche 996 GT2 2001-05
- Porsche 996 GT3 MKI 1999-02
- Porsche 996 GT3 MKII 2003>>
- Porsche 996 GT3 RS 2003-04
- Porsche 997 MK1 Carrera 2 3.6L 2005-08
- Porsche 997 MK1 Carrera 4 3.6L 2005-08
Shop Securely
12 Month Warranty
Worldwide Delivery

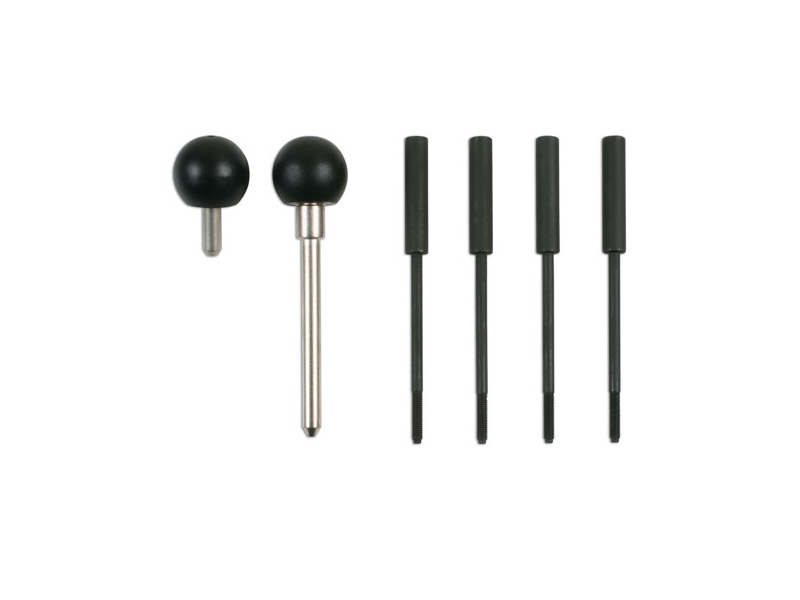
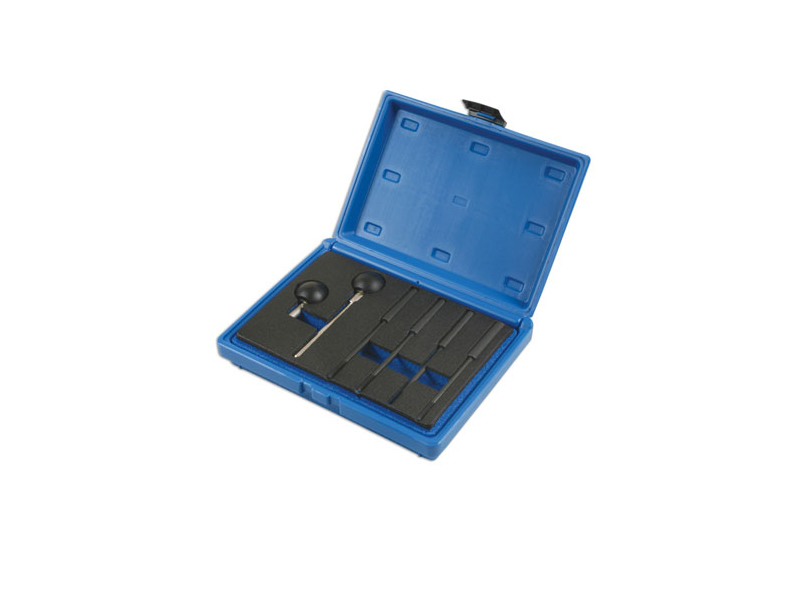
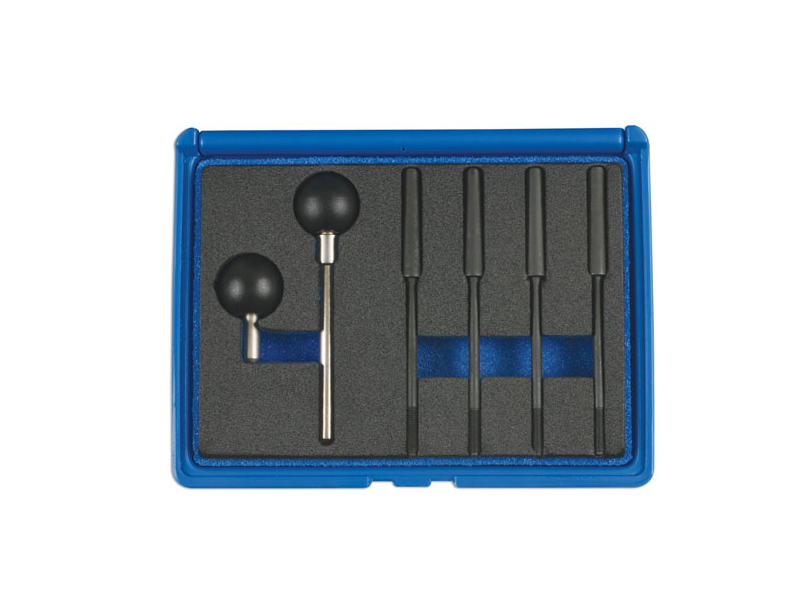
An engine crankshaft timing and tensioner pin kit, used to secure the crankshaft pulley and camshaft chain tensioners for the flat six 2.5, 2.7, 3.2, & 3.4 engines found in the Boxster and 911 Porsche models from 1996 to 2002.
Vehicle applications include: Porsche Boxster, Boxster S, 911, Carrera
Engine applications include: M96/01 (3.4), M96/01S (3.4), M96/20 (2.5), M96/21(3.2)
Equivalent to OEM 9595/1, 00072195951, 9632/1, 00072196321, 9632, 00072196320.
Contains both left and right hand threaded tensioner compressor pins.
Related reference numbers
Related, superseded, cross reference or alternative numbers for comparison.
7499
The product you are viewing cross references to these numbers
- Porsche Boxster 986 2.5L 1997-99
- Porsche Boxster 986 2.7L 1999-02
- Porsche Boxster S 986 3.2L 1999-02
- Porsche Boxster 986 2.7L 2003-04
- Porsche Boxster S 986 3.2L 2003-04
- Porsche 996 C2 3.4L 1997-08/01
- Porsche 996 C4 3.4L 1997-08/01
- Porsche 996 C2 3.6L 09/01-2005
- Porsche 996 C4 3.6L 09/01-2005
- Porsche 996 C4S 3.6L 09/01-2005
Shop Securely
12 Month Warranty
Worldwide Delivery

Specialist Tools for Accurate, Efficient & High-Quality Porsche Engine Rebuilds
Engine rebuilds require precise measurements, correct assembly procedures and the right equipment to ensure every component fits and functions exactly as intended. Specialist tools are essential when working on Porsche engines due to their unique engineering, tight tolerances and model-specific service procedures. These tools enable technicians and enthusiasts to dismantle, inspect, rebuild and calibrate engines with professional accuracy—reducing the risk of damage, misalignment or incorrect installation.
Whether performing a full engine restoration, carrying out timing work, inspecting internal components or installing performance parts, using the correct specialist tools guarantees a reliable, long-lasting and high-quality rebuild.
What Specialist Engine Rebuild Tools Do
High-quality specialist tools ensure precision and safety
throughout the rebuild process. They are designed to:
- Accurately
measure critical tolerances, including bore, deck height, ring gap and
valve clearances
- Correctly
install and remove components such as crankshafts, pistons, liners and
bearings
- Support
timing procedures, including camshaft alignment and intermediate shaft
setup
- Prevent
damage to delicate components during disassembly and assembly
- Improve
rebuild efficiency with purpose-built fixtures and holding tools
- Ensure
even torque application, promoting proper sealing and component
longevity
- Assist in diagnostic tasks such as leak-down testing or compression verification
Specialist tools are essential for achieving a professional-grade engine build with reliable and repeatable results.
Why Workshop Tools Wear or Fail
Even well-engineered tools degrade over time due to heavy
use, improper handling or exposure to harsh environments. Common causes of
failure include:
- Metal
fatigue from repeated loading
- Worn
or stripped threads on pullers, press tools or torque tools
- Corrosion
from moisture or chemical exposure
- Heat
damage from working near exhaust or cylinder heads
- Loss
of calibration, particularly with measuring or torque-sensitive tools
- Damaged
contact points from misuse or excessive force
- Contamination from debris or workshop dirt
A failing tool can cause inaccurate measurements, unsafe working conditions or even costly engine damage.
Why Specialist Tools Should Be Replaced or Upgraded
Replacing worn tools or upgrading to precision-engineered
alternatives provides clear benefits:
- Improved
measurement accuracy for critical engine dimensions
- More
reliable component installation, reducing the risk of misalignment
- Safer
workshop practices, preventing injury or engine damage
- Consistent
torque and calibration, essential for sealing and bearing load
- Enhanced
efficiency, saving time during complex rebuild procedures
- Better
compatibility with modern engines and performance upgrades
- Higher quality rebuild outcomes, improving engine reliability and longevity
Using proper tools is an investment in the quality of the rebuild and the health of the engine.
-
") Intermediate shaft (IMS)
Intermediate shaft (IMS)
-
Oil System Parts
-
Fuel System Parts
-
Gaskets & Sets
-
Radial Seal / RMS / Camshaft / Balance shaft
-
Belts / Tensioners / Rollers
-
Chains & Tensioners
-
Engine Bearings / Shells
-
Engine Valves / Guides / Springs
-
Rocker Arms & Tappets
-
Engine Bolts / Studs
-
Engine Mounts
-
Piston Rings
-
Engine Cylinders / Liners / Pistons
-
Connecting Rod
-
Cylinder Head / Camshaft Carrier
-
Camshaft covers / Gaskets
-
Camshaft gears / sprockets and fixings
-
Crankcase Parts
-
Crankshaft & Parts
-
Turbo Chargers / Intercoolers & Parts
-
Air Intake & Injection
-
Vacuum Pump
-
Engine Rebuild Kit
-
Jenvey Throttle Bodies
-
Cylinder Liner
Monday-Friday: 8.30am - 5.30pm (GMT)
Saturday: Closed
Sunday: Closed